My sister was surfin
Pinterest looking for cool art projects when she came across
Canvas Word Art. This is a really cool and easy art project to do if you are looking for some really neat art to decorate your home! Here are some simple guidelines to follow . . .
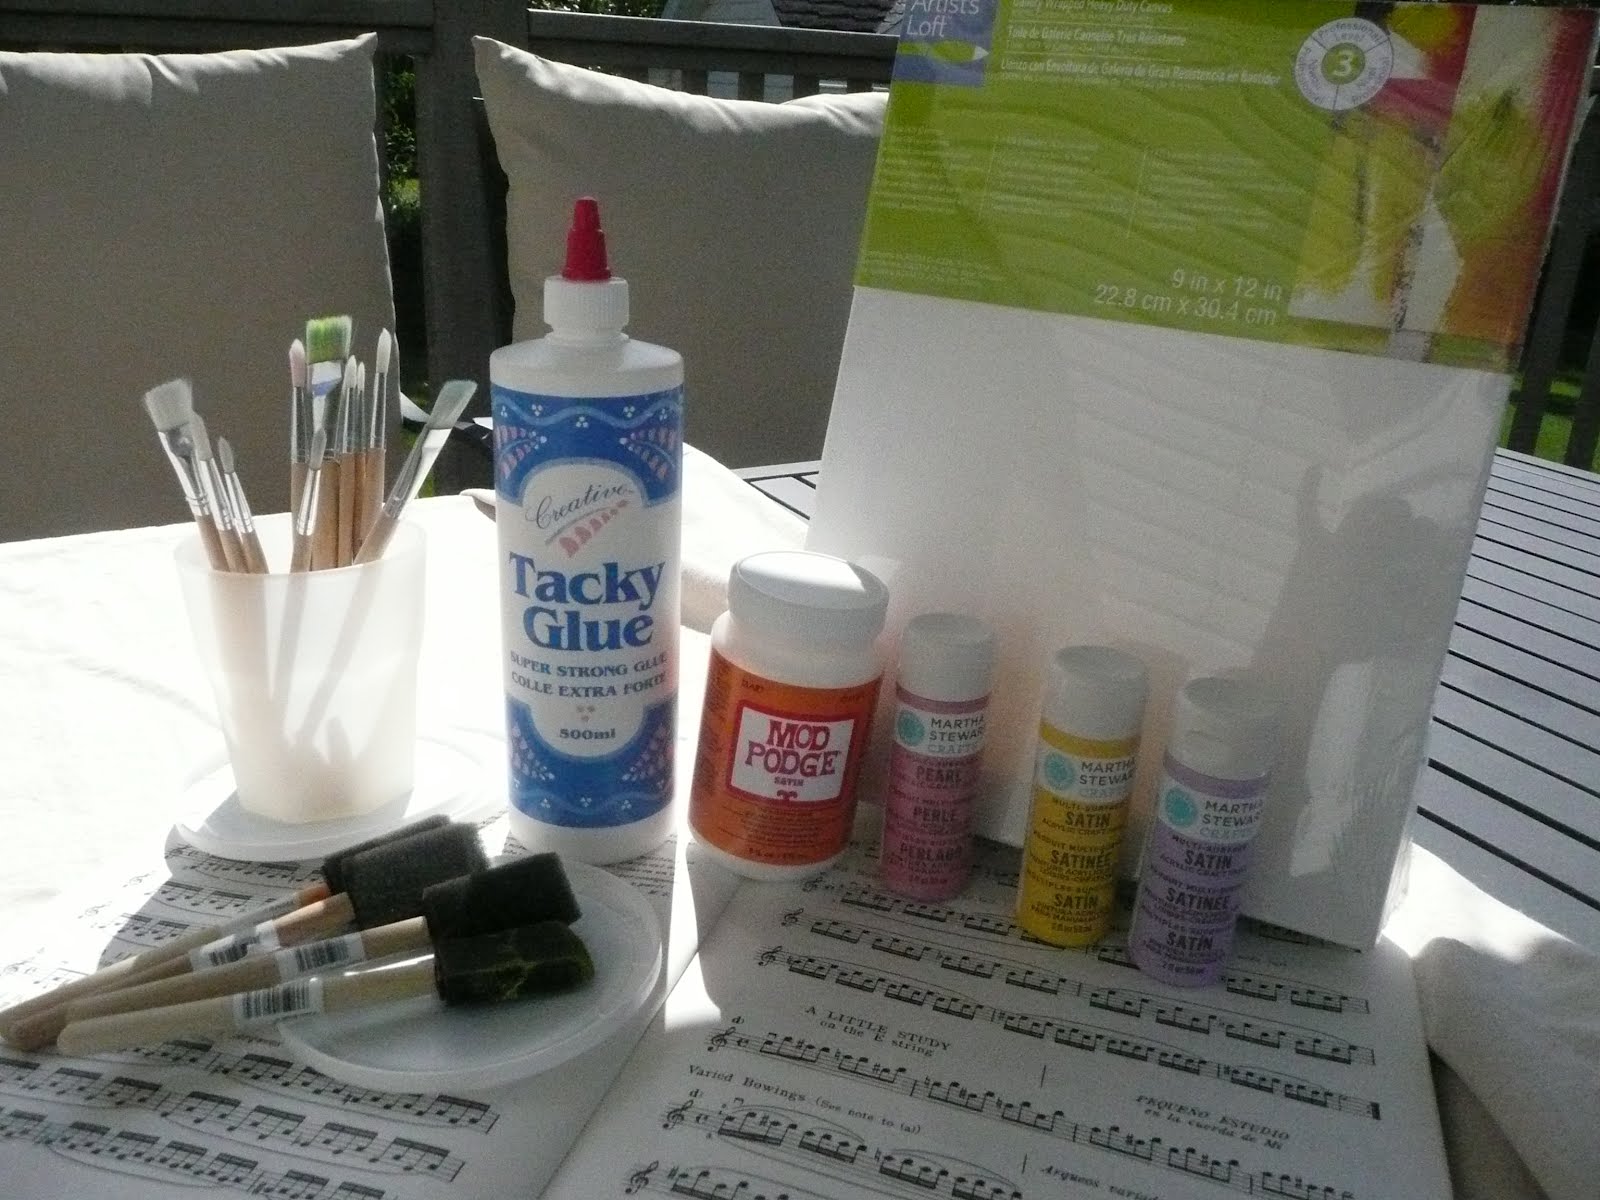
Supplies The supplies in the picture above include :
1. A blank canvas (size doesn't matter)
2. Sheet music
3. Paintbrushes
4. Paint (your choice of color)
5. Tacky Glue
6. Vinyl Letters
7. Mod Podge
8. Ruler
Step 1. Pick your sheet music. On my canvas art I used busy music so as to create a busy look. By busy music I mean lots of notes and terms. Once you have decided which piece(s), (depending on your size, you need to think about how many sheets of music you will need) you will then need to decide if you want to rip the sheet music into pieces and then glue them on, or glue whole sheets of music on. If you decide to rip, you will end up with more texture. If you decide to use whole sheets you will get less texture, and more smoothness.
Step 2. Start gluing. As you can see from the picture above, I have started gluing on my ripped pieces of sheet music. I chose to do ripped pieces to give it texture. If you choose to use whole sheets of sheet music, start gluing them on.
Step 3. Now that you are done gluing your music your photo should look like the one above. As I said earlier I did ripped pieces, so mine will look ripped and have more texture. If you chose to use whole sheets, yours should be covered completely by sheet music. (It's your choice if you want to do the sides of the canvas. I chose not to, as they will not be the main focus). Now that you have seen what it should look like, take your vinyl letters, and use the ruler to put them wherever you want them on the canvas, straight. You can do a quote with the letters, or whatever, but I chose to do my name.
Step 4. Now that you have put your vinyl letters on, you may now begin to paint. Paint gently over the canvas, and especially the vinyl letters, and paint the whole canvas. I chose to paint the sides of the canvas too so that the sides don't pop out, since you want the front to pop the most. If you choose not to do the sides, that is fine. I suggest doing 2-3 coats of paint, based on how much sheet music you want to show through. I did 2 coats + touch ups.
Step 5. After you are done painting you can take your vinyl letters off. I chose to use tweezers so as not to make fingerprints in the paint. After taking off the vinyl letters, let your painting dry.
Step 6. Depending on your type of paint you can choose whether you want to use Mod Podge. I did not use Mod Podge, because my paint had a shiny finish. Although, my sister did use Mod Podge, as hers did not have a shiny finish. If yours doesn't have a shiny finish, you can now take a clean paintbrush and paint the Mod Podge over the dry canvas. Mod Podge is used to give your painting an extra shine.
Voila! Now that you are finished your painting should look like this . . . (this is my canvas art)
Or, if you used Mod Podge, a not-so-shiny paint, and/or whole sheets of music, it should look like this . . . (this is my sister's canvas art)
Thanks again for visiting my blog, and checking out my project! If these instructions were too hard, check out my sister's blog:
crysanthemumsnotes.blogspot.com
Thanks! See ya!


No comments:
Post a Comment